สำหรับ ModMii ตอนที่ 2 จะเป็นเรื่องของการอัพเดทเครื่อง และทำให้เครื่อง Wii สามารถเล่นเกมส์จาก External Harddisk ได้ด้วย
การแก้ไขเครื่อง มีความเสี่ยง ผู้เขียนไม่ขอรับผิดชอบใดๆ ทั้งสิ้น หากเครื่องเสียหาย
เตรียมไฟล์ที่จำเป็น
ในตัวอย่างที่แสดงให้ดู เป็นการอัพเดทเครื่อง Wii (แปลงเมนูเกาหลี เป็นภาษาอังกฤษ มี Firmware 4.1U) ให้เป็น Firmware 4.1U แต่มี IOS ที่จำเป็นต่างๆ และสามารถเล่นเกมส์ผ่าน External Harddisk ได้
เริ่มต้นด้วยการเปิดโปรแกรม ModMii ขึ้นมา
ถ้ายังไม่มี ให้ดูวิธีการติดตั้งได้ที่ แปลงเครื่อง Wii ง่ายๆด้วย ModMii (ตอนที่ 1)
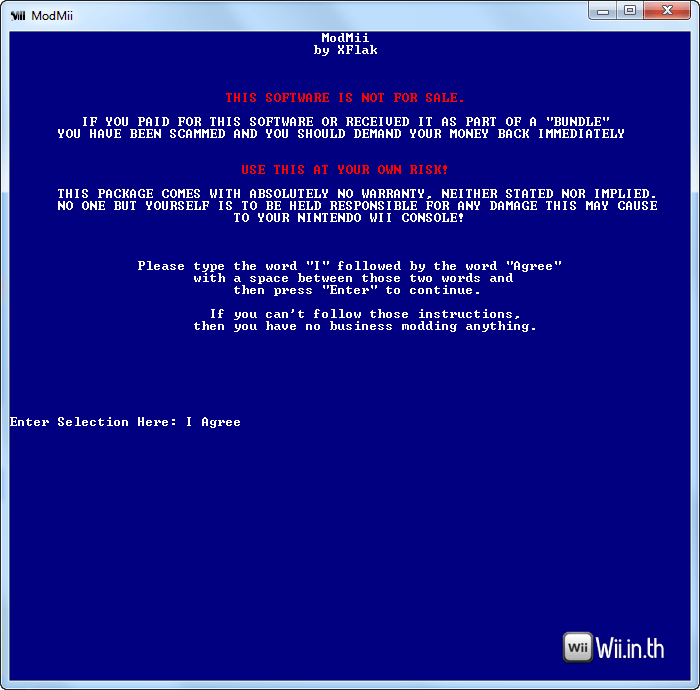
- พิมพ์คำว่า I Agree ลงไป เพื่อเข้าโปรแกรม
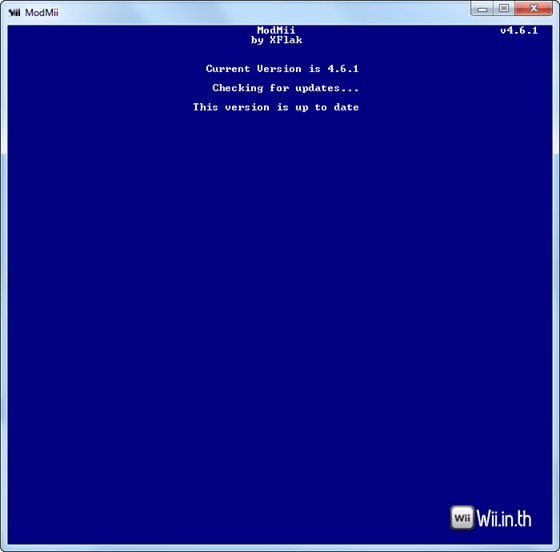
โปรแกรมจะทำการเช็คเวอร์ชั่นใหม่จากระบบ ถ้ามีเวอร์ชั่นใหม่ออกมา โปรแกรมจะอัพเดทตัวเอง
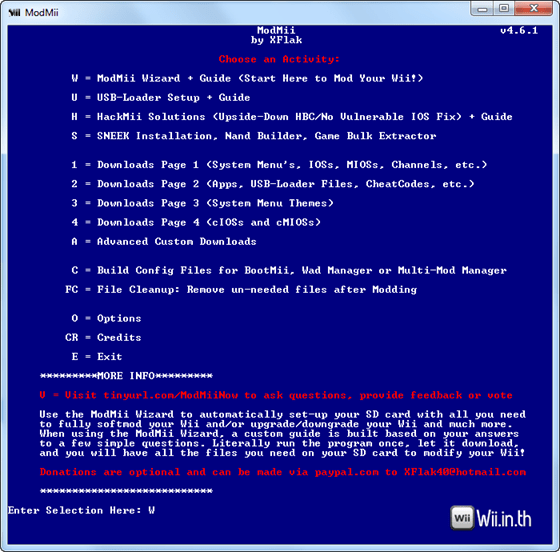
- พอเข้ามาถึงเมนูหลัก ให้เลือก W
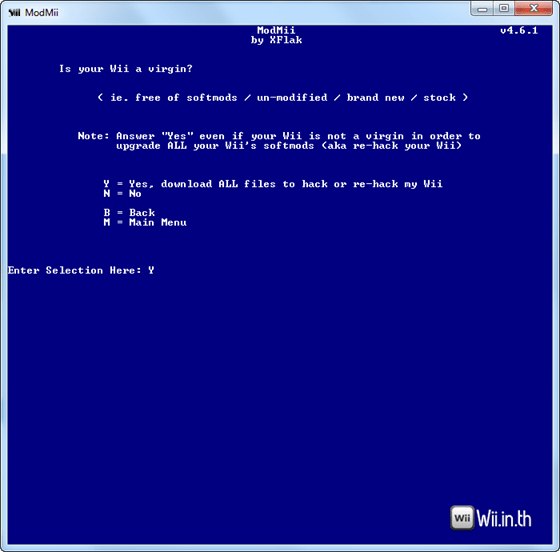
- โปรแกรมจะถามว่าเครื่อง Wii ของเรา เคยผ่านการแปลงมาหรือยัง แต่ตอบ Y ลงไปได้เลย เพราะเราต้องการทำใหม่
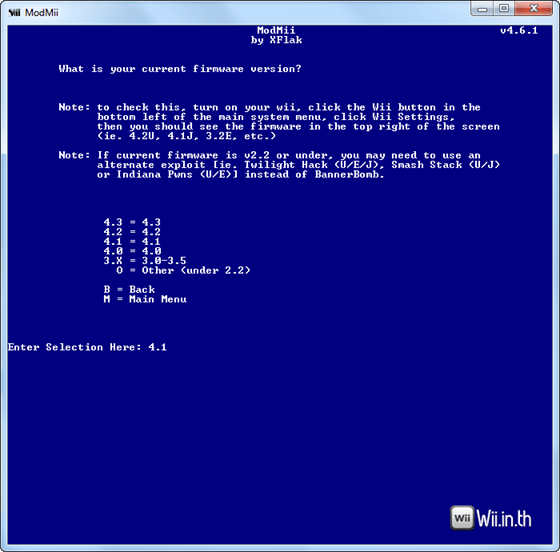
ขั้นตอนนี้ ModMii ถามว่าเครื่อง Wii ของเราตอนนี้มี Firmware Version อะไร
- เครื่อง Wii ที่ใช้ทดลองมี Firmware 4.1U ก็เลยใส่ค่า 4.1 ลงไป
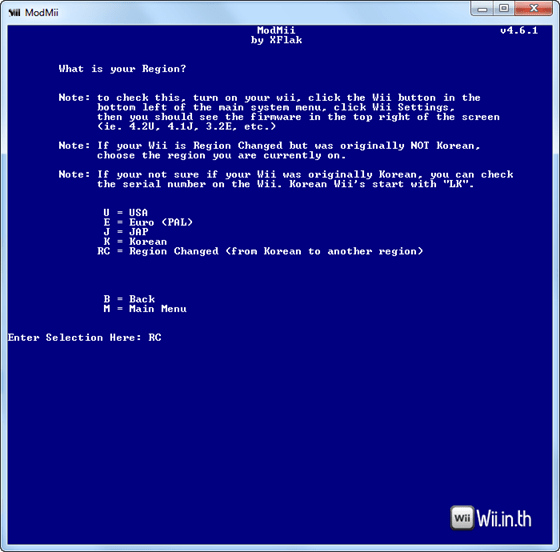
ModMii ก็จะถามต่อว่าเครื่อง Wii ของเราเป็นโซนไหน ตรงนี้ให้ดู Serial No. ใต้เครื่อง Wii ว่าขึ้นต้นด้วย LK หรือเปล่า ถ้าใช่ แสดงว่าเครื่อง Wii ของเราเป็นเครื่องเกาหลี
จากนั้นให้ดู Firmware ของเครื่อง Wii ว่าเป็น Version ไหน ถ้าไม่ได้ลงท้ายด้วย K แสดงว่าเป็นเครื่องที่เปลี่ยน Region มาแล้ว
แต่ถ้าเครื่อง Wii ไม่ได้เป็นเครื่องเกาหลี ก็ให้ดูที่ Firmware ในเครื่องได้เลย ว่า Firmware ลงท้ายด้วยอะไร ก็ใส่ลงไปได้เลยครับ
อย่างเช่นเครื่อง Wii เป็นเครื่องญี่ปุ่น แต่ทำการแปลงเมนูให้เป็นภาษาอังกฤษแล้ว ลองดู Firmware แล้วเป็น Version 4.1U ก็ให้ถือว่าเครื่องนี้เป็นเครื่อง USA
- แต่เครื่อง Wii ที่นำมาทำให้ดู เป็นเครื่องเกาหลี แปลงเมนูเป็นภาษาอังกฤษ มี Firmware Version 4.1U ดังนั้นในขั้นตอนนี้ต้องเลือกเป็น RC
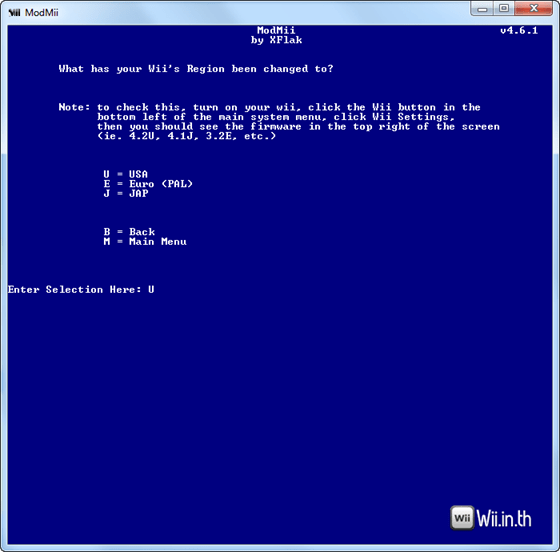
ขั้นตอนนี้จะถามเฉพาะคนที่ใช้เครื่องเกาหลีที่แปลงเมนู ModMii ก็จะถามว่าเครื่อง Wii แปลงเป็นโซนไหน
- เครื่อง Wii ที่นำมาทดสอบเป็น 4.1U ดังนั้นเราก็ใส่ U ลงไป
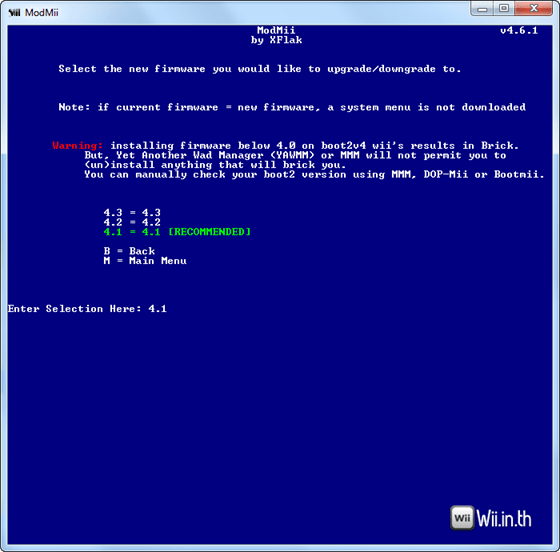
ขั้นตอนต่อมา ModMii จะถามว่าเราอยากจะติดตั้ง Firmware Version ไหนลงไปในเครื่อง Wii
- โปรแกรมแนะนำให้ใส่แค่ Version 4.1 เราก็เลือก 4.1
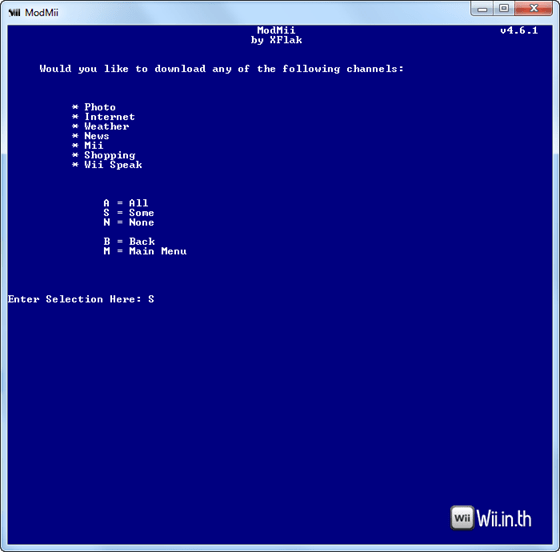
ModMii ถามว่าต้องการติดตั้ง Channel Photo, Internet, Weather, News, Mii, Shopping, Wii Speak หรือไม่
- ผมต้องการใส่แค่บางตัว ก็เลือก S แต่ถ้าต้องการใส่ทั้งหมด ก็เลือก A
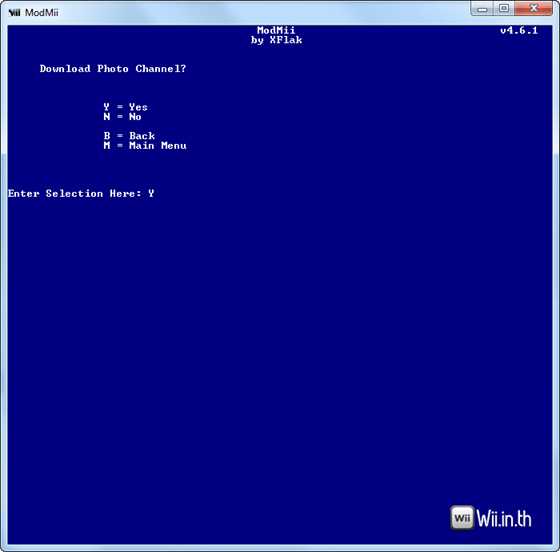
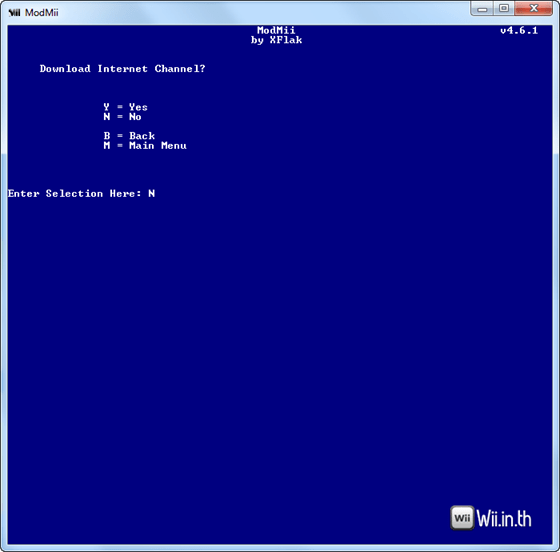
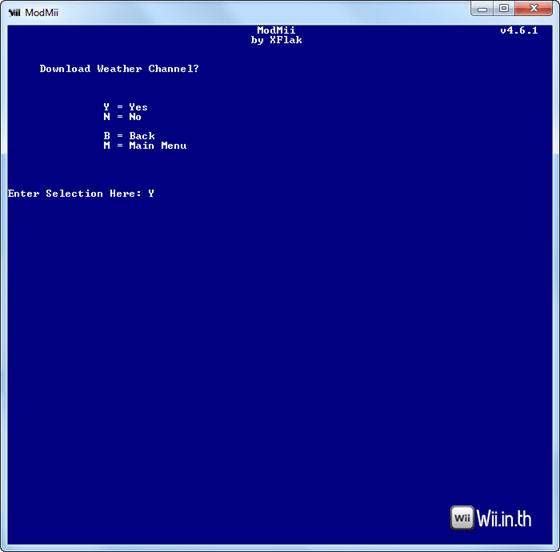
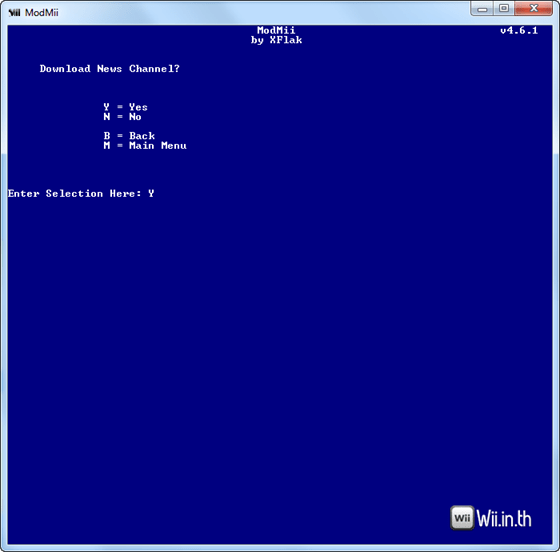
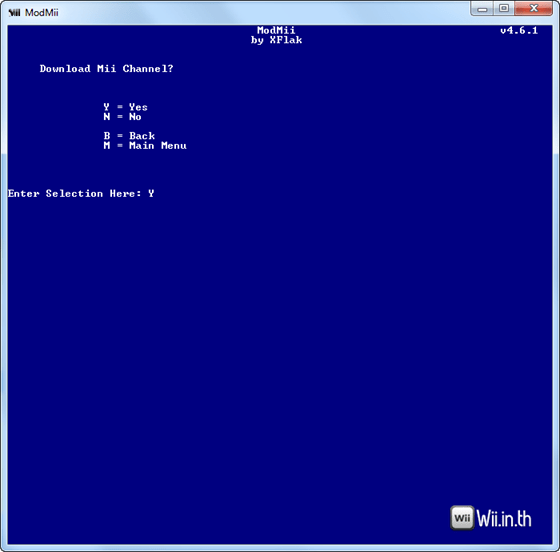
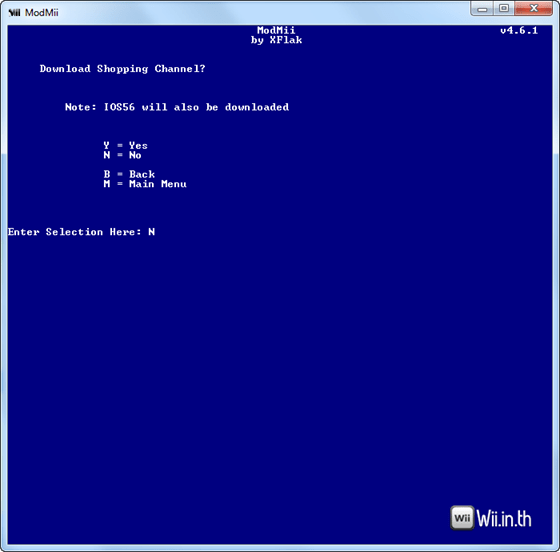
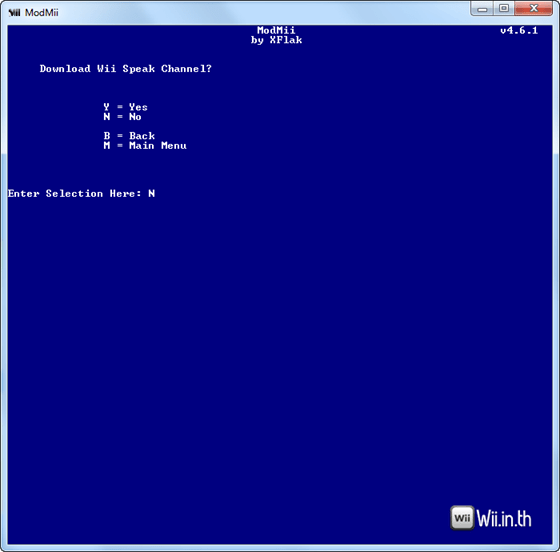
เมื่อเราเลือกติดตั้ง Channel แค่บางตัว (S) ModMii ก็จะไล่ถามที่ละตัว ว่าต้องการติดตั้งตัวไหนบ้าง
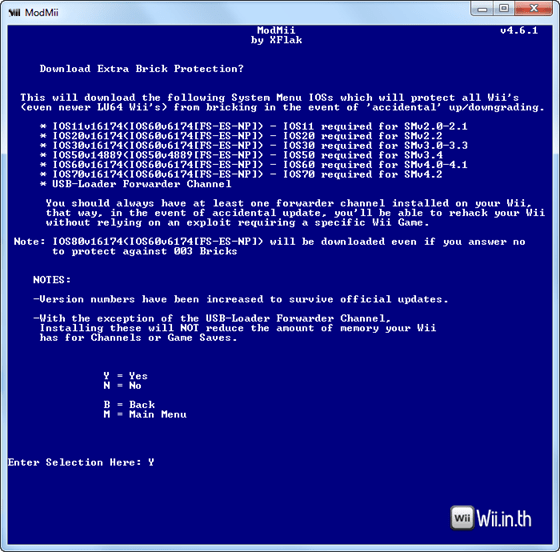
ถ้าต้องการใส่โปรแกรมป้องกันเครื่อง Brick ด้วยสาเหตุต่างๆ ก็ให้เลือก Y
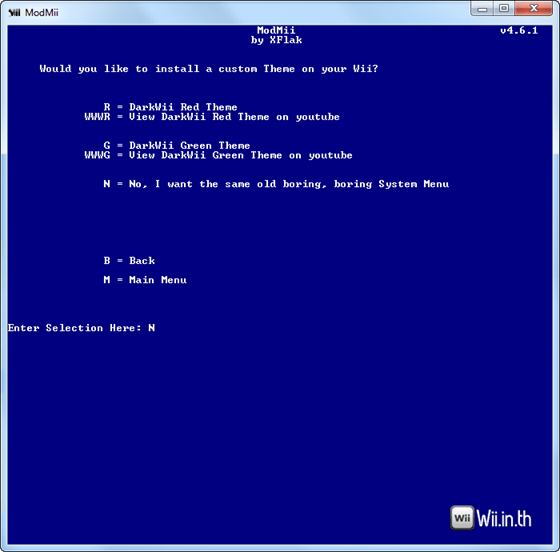
ในขั้นตอนนี้ ModMii ถามว่าต้องการเปลี่ยน Theme ในหน้าเมนูของเครื่อง Wii เป็นสีอื่นหรือไม่
- ผมได้ลองหมดละ แต่ชอบสีเดิมมากกว่า ก็เลยเลือก N
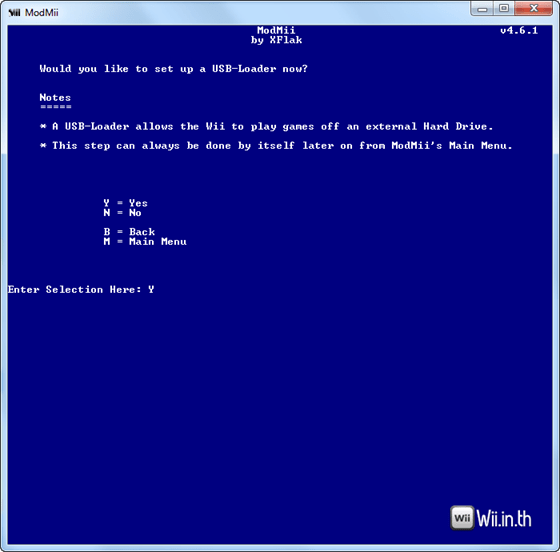
ขั้นตอนนี้เป็นการเตรียมไฟล์สำหรับใส่ลงไปใน External Harddisk เพื่อเล่นเกมส์จาก External Harddisk ได้
- ผมต้องการเตรียมไฟล์ไปพร้อมกันเลย ก็เลือก Y
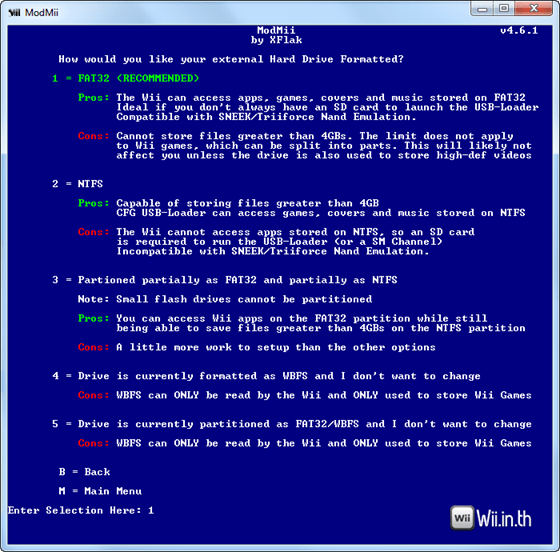
ModMii ถามว่าเราอยากใช้ External Harddisk ใน Format แบบไหน
- ซึ่งแบบที่ง่ายๆ ก็จะเป็น FAT32 เราก็เลือก 1
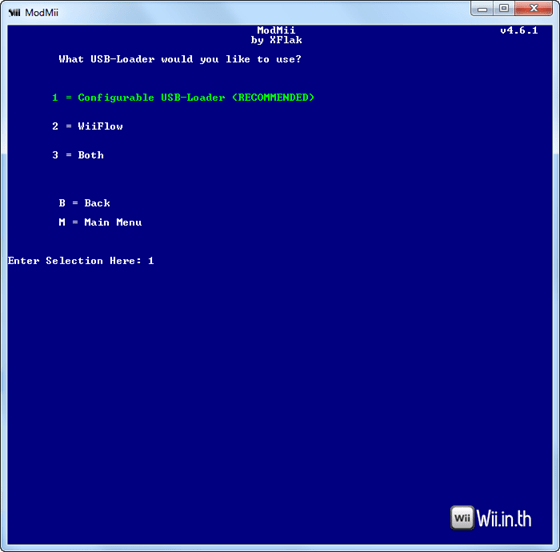
ModMii ถามว่าอยากจะใช้ USBLoader ตัวไหน
- Configurable USBLoader เป็นตัวที่สวยงาม ใช้งานง่าย ก็เลือก 1
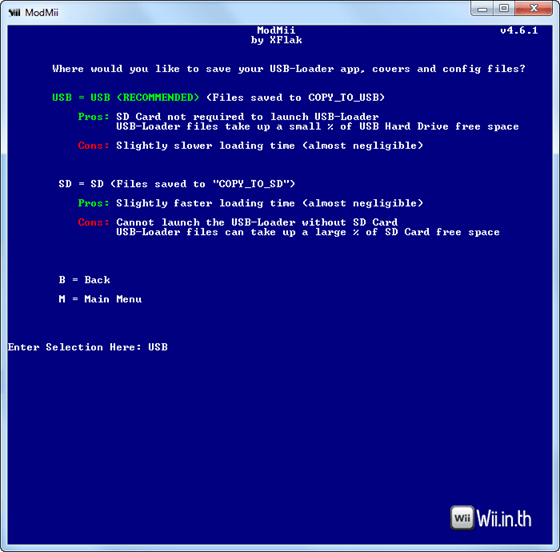
โปรแกรมถามว่า ต้องการใส่โปรแกรม USBLoader ไว้ที่ External Harddisk หรือว่า SD Card ก็จะมีข้อดีข้อเสียคือถ้าใส่ลง External Harddisk ก็จะไม่ต้องเสียบ SD Card ค้างไว้ที่เครื่อง Wii แต่จะใช้เวลาเข้าโปรแกรมนานกว่านิดหน่อย
- ผมเลือกเป็น USB
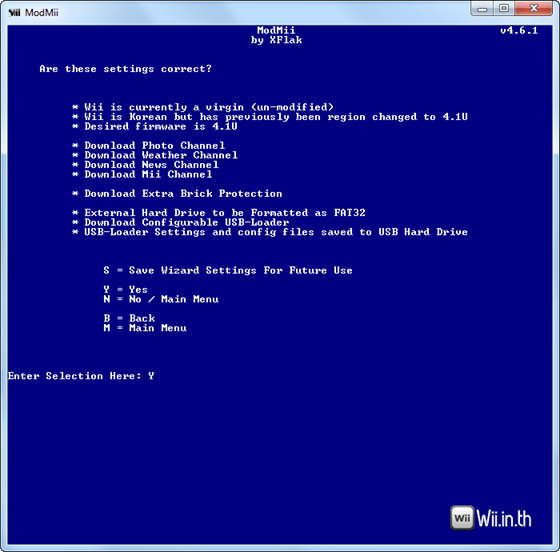
ตรวจดูอีกครั้งว่าสิ่งที่เราเลือกไปถูกต้องแล้วหรือไม่
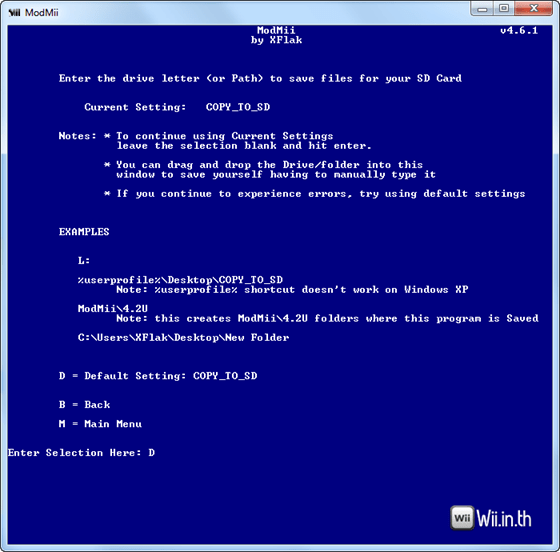
ModMii ถามว่าจะให้เตรียมไฟล์สำหรับ SD Card ไว้ที่ไหน
- เลือกเป็น Default ไปเลยครับ
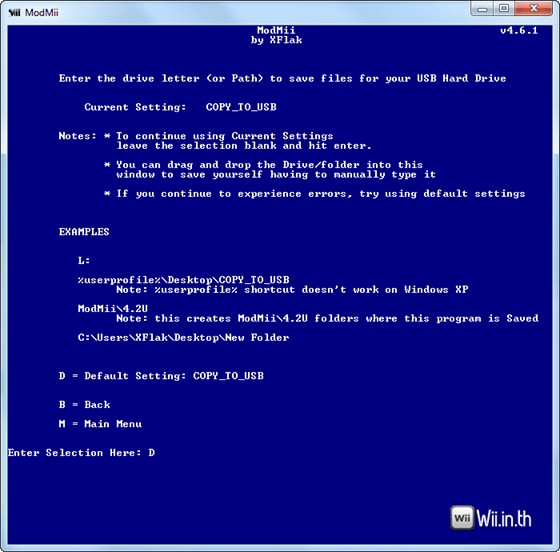
ModMii ถามว่าจะให้เตรียมไฟล์สำหรับ USB ไว้ที่ไหน
- อันนี้ก็เลือกเป็น Default ครับ
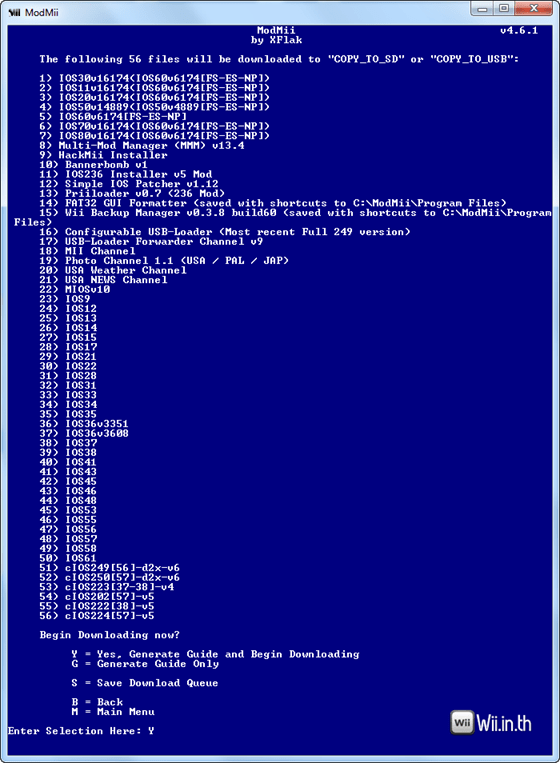
เริ่มต้นดาวน์โหลดไฟล์ทั้งหมด ก็เลือก Y เลยครับ
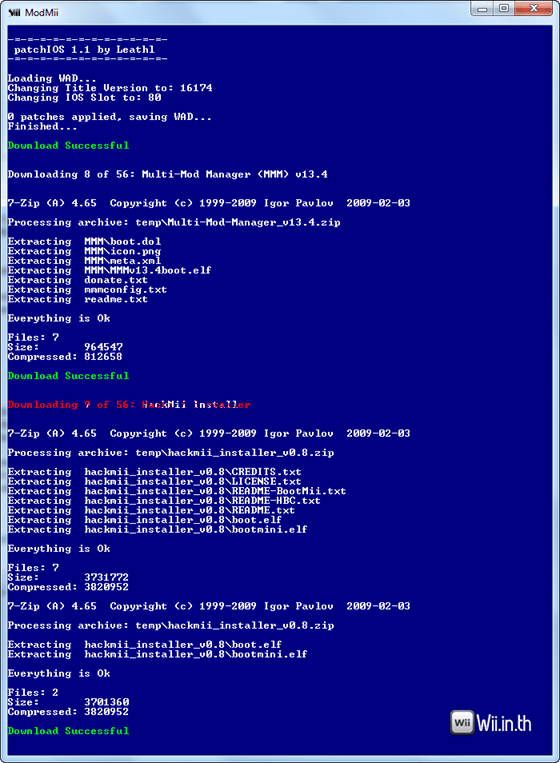
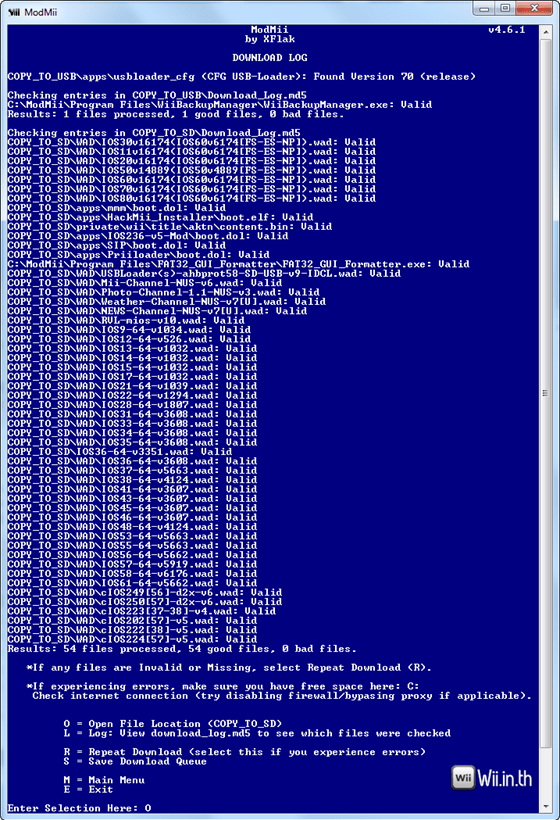
จากนั้นก็รอจนโปรแกรมดาวน์โหลดไฟล์ที่จำเป็นต้องใช้ทั้งหมดเสร็จ
ModMii ก็จะทำคู่มือการติดตั้งมาให้ด้วย (เป็นภาษาอังกฤษ)
ดาวน์โหลดเสร็จแล้ว
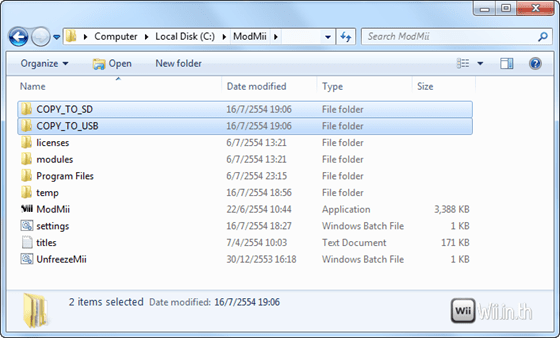
พอเปิดดูใน Folder ของโปรแกรม ModMii (ปกติจะอยู่ที่ C:ModMii) ก็จะมี Folder COPY_TO_SD และ COPY_TO_USB เพิ่มขึ้นมา
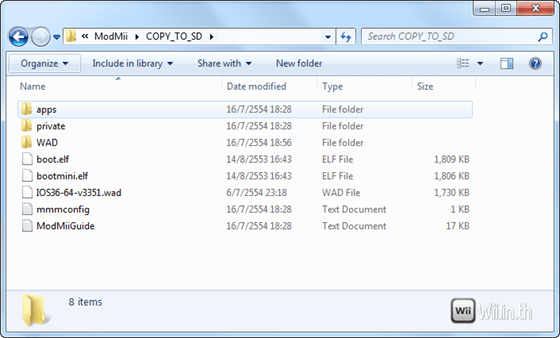
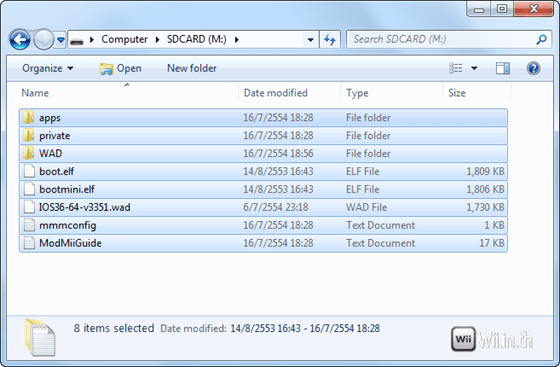
เข้าไปดูใน Folder COPY_TO_SD ก็จะมีไฟล์ตามภาพด้านล่าง
ให้ Copy ไฟล์ทั้งหมดใน Folder COPY_TO_SD ไปใส่ไว้ใน SDCard (SDCard ต้อง Format เป็น FAT32 นะครับ)
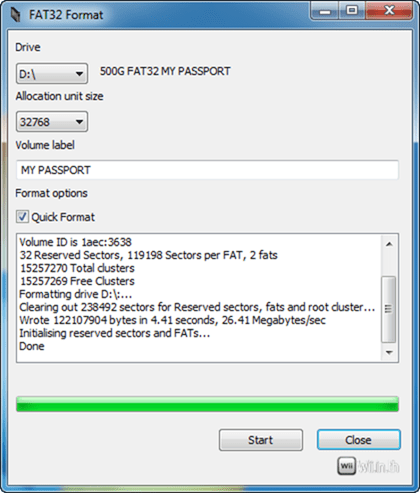
จากนั้นให้เริ่มเตรียม External Harddisk โดย Format ให้เป็น FAT32 ก่อน (ไฟล์ใน External Harddisk จะหายทั้งหมดนะครับ)
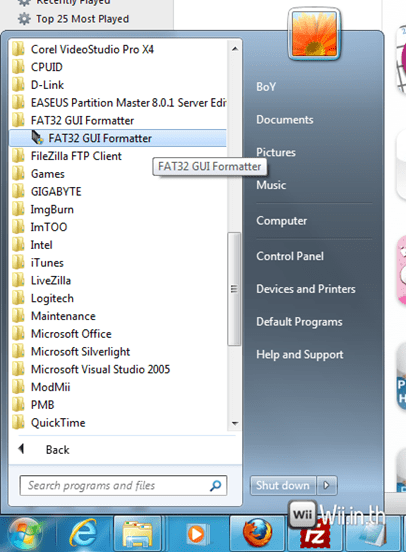
ให้เลีอกโปรแกรม FAT32 GUI Formatter จาก Start Menu ของ Windows
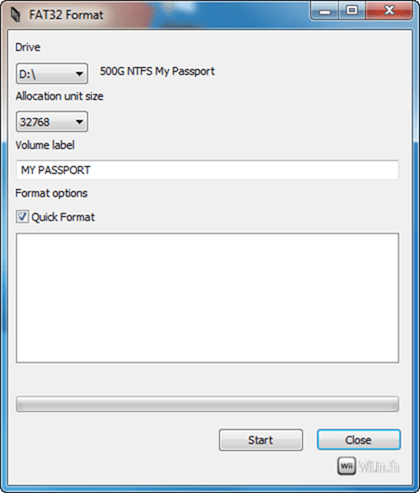
พอเปิดโปรแกรมขึ้นมาก็เลือก Drive ที่ต้องการ Format อย่างของผมเป็น Drive D (ดูดีๆนะครับ เดี๋ยวไป Format ผิด Drive) แล้วกดปุ่ม Start
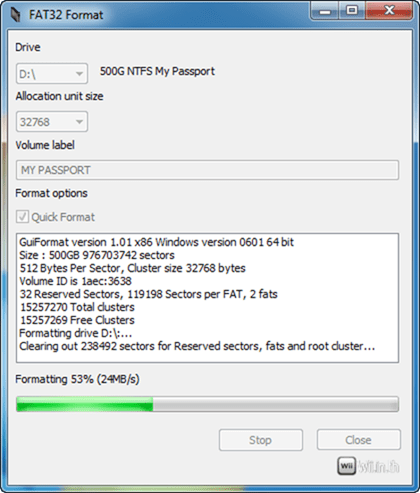
รอสักครู่
พอเสร็จแล้วก็กดปุ่ม Close ปิดโปรแกรมไป
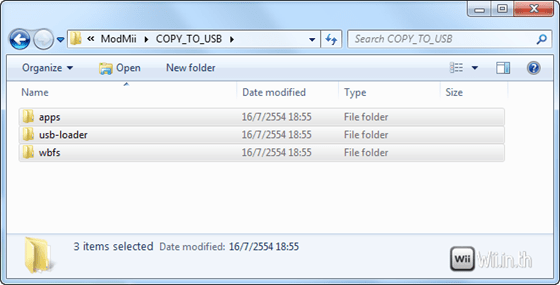
จากนั้นมาดูที่ Folder C:ModMiiCOPY_TO_USB ซึ่งมีไฟล์ตามภาพด้านล่าง
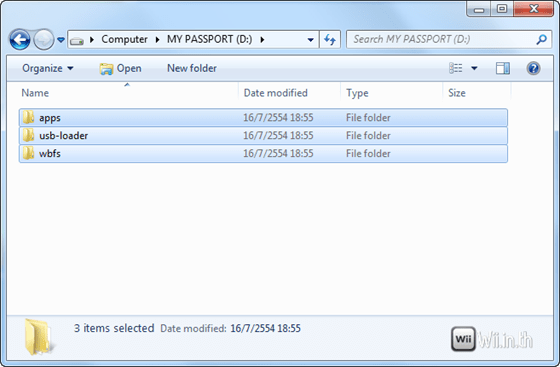
ให้ Copy ไฟล์ทั้งหมดไปใส่ไว้ใน External Harddisk ที่ได้ Format เป็น FAT32 แล้ว
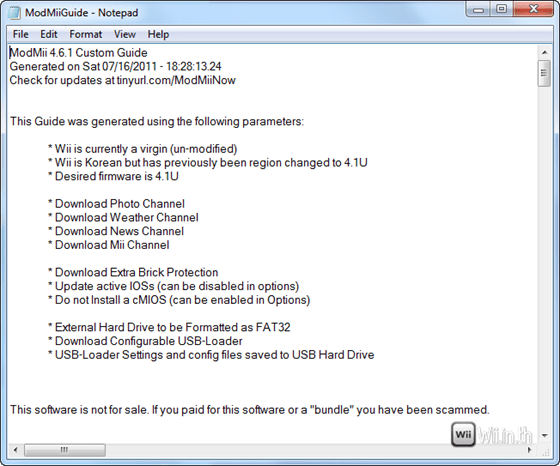
ต่อไปก็เป็นการติดตั้งเข้าเครื่อง Wii ซึ่งการติดตั้งจะทำตามคู่มือที่ ModMii สร้างขึ้นมาให้ ซึ่งอยู่ใน Folder C:ModMiiCOPY_TO_SD เป็นไฟล์ชื่อ ModMiiGuide.txt
วิธีการตามคู่มือของแต่ละเครื่องจะไม่เหมือนกัน ขึ้นอยู่กับค่าต่างๆที่เราได้ใส่ลงไปใน ModMii ดังนั้นควรจะทำตามทุกขั้นตอน อย่าไปข้ามมันนะครับ และทำตามคู่มือของตัวเอง ไม่ต้องมาทำตามผมนะครับ ด้านล่างนี้เป็นเพียงตัวอย่างเท่านั้น !!!
ซึ่งในตัวอย่างของผมมีดังนี้ครับ (เสียบ SD Card เข้าที่เครื่อง Wii ได้เลย)
1) INSTALLING THE HOMEBREW CHANNEL (HBC) AND BOOTMII ================================================= Run BannerBomb v1 by going to Settings, Data Management, Channels, SD Card and choosing yes to load boot.dol/elf Note: If it doesn't work for you, visit http://bannerbomb.qoid.us/ for more variations of either version of bannerbomb. This runs the Hackmii Installer (and silently/automatically installs BootMii as IOS). Use the installer to install the Homebrew Channel (HBC) and Bootmii as Boot2 if possible. If you cannot install BootMii as Boot2, you also need to 'prepare an SD Card' for BootMii (as the 'BootMii' folder is required to launch BootMii as IOS or Boot2). Note: If you get a 'no vulnerable IOS' error message, run ModMii again and this time select the 'Hackmii Solutions' option instead of 'ModMii Wizard' and follow the new instructions before continuing this guide. After you exit the hackmii installer, you will be taken to the HBC. Hit the home button. In the top right corner you will see the IOS used by the HBC. If the HBC is using an IOS other than IOS58 or your homebrew channel is upside-down, make a note of it as it applies later in the guide (you will have to reinstall the HBC). If it is using IOS58 and your HBC is not upside-down, you can skip the Reinstall The Homebrew Channel step when you get to it.
1. ติดตั้ง Homebrew Channel และ BootMii
- ติดตั้งโดยใช้วิธี BannerBomb คือให้เข้าไปที่เมนู Wii Options >> Data Managerment >> Channels >> SD Card แล้วก็เลือก Yes เพื่อ Load boot.dol/elf
- พอเข้ามาใน HackMii Installer แล้ว ให้เลือก Install Homebrew Channel และ BootMii
- จากนั้นก็ให้ทำการเลือก Prepare a SD Card ด้วย
2) MAKING A NAND BACKUP ==================== While inside the Homebrew Channel, load BootMii by pressing home and clicking Launch Bootmii. Press the power button on the wii 3 times to get to the last option, then press the reset button. [You can also navigate with a Gamecube controller] Press reset to choose the first option, then follow the directions on the screen to make your NAND backup. [Bad blocks are no problem.] Backup the Bootmii folder, NAND.bin, and keys.bin elsewhere and erase from the sd card (or rename it). You'll need these in case of emergencies, so don't lose them. Go back to The Homebrew Channel. Note: if Bootmii was installed as boot2, then it will show up as soon as the Wii is turned on AS LONG AS it finds the bootmii folder (mentioned above) on the root of the SD card.
2. ทำการ Backup NAND ของเครื่อง Wii
การ Backup NAND ของเครื่องไว้ มีประโยชน์คือ หากทำพลาดไป ยังพอมีโอกาสที่จะกู้ระบบกลับมาได้ครับ
- เข้าไปที่ Homebrew Channel
- กดปุ่ม Home (รูปบ้าน) ที่ WiiMote แล้วเลือกไปที่เมนู BootMii
- พอเข้ามาที่โปรแกรม BootMii แล้ว WiiMote จะใช้งานไม่ได้ ต้องกดสั่งจากตัวเครื่อง Wii
- กดปุ่ม Power ที่เครื่อง 3 ครั้ง แล้วกดปุ่ม Reset 1 ครั้ง
- กดปุ่ม Reset 1 ครั้ง แล้วรอจนกว่าจะเสร็จ ซึ่งใช้เวลาประมาณ 20 นาที
- พอเสร็จแล้ว กดปุ่มอะไรก็ได้ที่เครื่อง Wii 1 ครั้ง เครื่องก็จะ Restart กลับมาใหม่
3) INSTALL A PATCHED IOS236 ======================== Start the Homebrew Channel. VERY IMPORTANT! In the Homebrew channel, if you do not have a working internet connection already set up, you will see an icon flashing in the bottom right corner of the screen indicating its inability to initialize the network. You MUST wait for the icon to stop flashing OR let it flash for 30-60 seconds before proceeding otherwise these apps will error shortly after being launched. If you encounter this harmless error, power off the Wii and repeat this step from the beginning. To increase your chances of success, add a working internet connection to your Wii via the official Wii Settings Menu, but be sure to say "No" when asked to perform an update. You only need to perform ONE of the below methods. Method A: Using IOS236 Installer -------------------------------- After waiting 30-60 seconds for the HBC to attempt to initialize the network, launch "IOS236 Installer v5 MOD". Note: This app must be launched using HBC v1.0.7 or higher in order to work properly. It should say "IOS236 installation is complete!" and return to The Homebrew Channel. If you experience errors, keep trying and it should eventually work. If you continue to experience errors you can try using Simple IOS Patcher instead. Once either method successfully installs IOS236, you can move onto the next step. Method B: Using Simple IOS Patcher ---------------------------------- After waiting 30-60 seconds for the HBC to attempt to initialize the network, launch "IOS236 Installer". Note: This app must be launched using HBC v1.0.7 or higher in order to work properly. Choose "IOS36" (already selected by default) and push A, Select "Install IOS to slot" and choose 236, Select "Install patched IOS36" leaving the 4 patches set to "yes" and press A, Choose "Load IOS from SD card". Confirm your choice with the A button, When prompted, push A to continue the installation. When the installation is over you'll be back at the Main Menu, Then push B button to exit. If you experience errors, keep trying and it should eventually work. If you continue to experience errors you can try using IOS236 Installer instead. Once either method successfully installs IOS236, you can move onto the next step.
3. ติดตั้ง IOS236 Patched
- เปิด Homebrew Channel ขึ้นมา
- เลือกไปที่ IOS236 Installer V5 MOD แล้ว Load ขึ้นมา
- รอสักครู่
4) INSTALL PRIILOADER ================== Launch "Priiloader 236 Mod" via the Homebrew Channel After the Priiloader Installer loads, press + to install it. You may get an error for "loader.ini" and/or "password.txt" simply ignore these. After successfully installing Priiloader, access it by powering off the Wii, then powering it back on while holding reset until you see the Priiloader menu. You should install some system menu hacks now (by going to System Menu hacks option). RECOMMENDED HACKS: Block Disc Updates, Block Online Updates, Replace Health Screen, Auto-Press A at Health Screen, Region-Free Everything, remove no copy save file protection, and Move Disc Channel. The priiloader menu is white by default, you can change it to black in the Priiloader settings if you prefer. One of the special functions of Priiloader is that it can autoboot any app/file instead of the system menu. Some apps (like crazyIntro) can't be used without it. For details on how to do so, visit www.sites.google.com/site/completesg/system-hacks/priiloader
4. ติดตั้ง PriiLoader
- เลือกไปที่ Priiloader 236 Mod ใน Homebrew Channel แล้วกด Load ขั้นมา
- ให้กดปุ่ม + เพื่อติดตั้ง PriiLoader
- รอสักครู่ ถ้ามี error “loader.ini” และ/หรือ “password.txt” ก็กดข้ามไปได้เลย
5) INSTALL WADS ============ Load Multi-Mod Manager (MMM) via the HomeBrew Channel. If IOS236 is not already loaded, select "Load another IOS", then select IOS236 Note: If this step fails with error -ret 2011 or other, you may need to retry patching IOS236. If the Wii was previously softmodded, you can try loading cIOS250 (or others like 202,222,223,224,236,249) In Multi-Mod Manager's main menu, go down to select "WAD Manager". Install the following WADs from the WAD folder (this list of WADs is unique to how you answered the Wizard's questions). Be careful not to install any additional wads that may have been previously saved in this folder (they may be safe, but I cannot say for sure). Hold + for 2 seconds to select all the WADs in the folder. Then Press A twice to install them all. If any files fail to install properly, they will remain marked for installation, so just retry installing those files.
5. ติดตั้ง WAD
- เปิด Multi-Mod Manager (MMM) จากใน Homebrew Channel
- เลือกไปที่เมนู “WAD Manager”
- กดปุ่ม + ค้างไปประมาณ 2 วินาที แล้วกดปุ่ม A 2 ครั้ง
- ถ้า Install ไปแล้วมี Error ให้ทำการ Install ใหม่
ตอนนี้การแปลงเครื่องก็เสร็จแล้ว ต่อไปเป็นการทดสอบว่าใช้งานได้หรือไม่
- เริ่มต้นด้วยการนำ External Harddisk ที่ได้เตรียมไฟล์เอาไว้แล้ว มาใส่เกมส์ลงไป (วิธีการใส่เกมส์เข้า External Harddisk)
- จากนั้นก็นำ External Harddisk ไปเสียบเข้าที่เครื่อง Wii (เสียบเข้า USB ช่องที่อยู่ใกล้ขอบของเครื่อง)
- เปิดเครื่อง Wii แล้วเข้าไปที่ USBLoader
วิธีใส่หน้าปกเกมส์ลงใน External Harddisk เพื่อให้ USBLoader แสดงหน้าปก

[…] […]
สอบถามหน่อยครับ ไม่ทราบว่าทำตามขึ้นตอนนี้จะสามารถเล่นแผ่นก็อปได้ไหมครับ หรือต้องเล่นผ่านHDDเท่านั้น พอดีมีเกมที่อยากเล่นประมาณ10เกม ไม่อยากเสียเงินซื้อHDDน่ะครับ
ถ้าจำไม่ผิด เล่นแผ่น copy ไม่ได้นะครับ
สอบถามหน่อยค่ะ พอทำทุกขั้นตอนครบแล้ว ทำไมโฟลเดอร์ COPY_TO_USB เป็นโฟลเดอร์เปล่าออ่าค่ะ
ขอบคุณสำหรับข้อมูลดีๆ ที่แบ่งปันครับ
สอบถามนิดครับ. ตอนแปลงข้ามโซน สมติเครื่องjapan เป็น us
มันแปลงไงครับ เพราะที่อ่านดุมันทำก่อนจังหว่ะ ลงhomebrew หลังก็อปไฟล์ใส่ sdcard เอาไปเสียบ wii แล้วต้องกดไปที่ไหนครับ
อีกข้อ หลังแปลงเป็น us เราก็เลือกลงhomebrew us เลยใช่ไหมครับ
ถ้าเครื่องแปลงมาแล้ว อยากเล่นเกมแผ่นแท้ จะเล่นแผ่นแท้ได้ไหมค่ะ